

how to add tv shows to kodi library
You are here: Home / HTPC / Kodi (XBMC) / How to Seamlessly Integrate Netflix and Hulu into Kodi
One common problem for the cord cutters is how to integrate Kodi, Netflix, Hulu and other channels.
This is where PlayOn, a streaming video recorder will come in handy.
In this practical guide, you will learn how to seamlessly use Netflix, Hulu, Amazon Prime Instant Video and more with Kodi to get a unified user interface.
For Windows users, there are various ways to get premium content channels working through their websites or Windows apps, but if you are using a Linux-based home theater computer such as OpenELEC HTPC or Raspberry Pi, there is no direct way to get Netflix working.
It gets better:
In this guide, I will show you an easy way to get Netflix, Hulu and Amazon Instant Video working with the Kodi running on Windows and Linux-based computers, such as OpenELEC HTPC and Raspberry Pi, which has not been widely known before.
What You Will Need
You will need to purchase PlayOn (get it here) in order to:
- Record online videos (first part of this post)
- Stream online videos (second part of this post)
Note: PlayOn has recently released a new cloud-based streaming recording service that allows you to record and download streaming shows and movies via the cloud with their PlayOn Cloud iOS app (learn more). No PC is required.
In order to complete this guide, you will need a Windows-based PC and PlayOn Media Server application that allows you to record, watch and stream premium content channels into Kodi running on any operating system.
Let's get started.
Record Online Videos with PlayOn
The easiest way to record movies and TV shows to your HTPC or Network Attached Storage is with Windows-based PlayOn software.
The benefit of this approach is that you can simply add movies and TV shows to the recording queue using PlayOn's simple user interface. Then, you can add recorded media files to your Kodi library as you would for any other files.
How PlayOn Works
PlayOn captures the content second per second as you would see it when streaming online. Recording time is the same as watching it in real time, so the best way is to add several movies and TV shows to the recording queue and let it to record overnight.
PlayOn supports 720P HD video quality when available, so your recordings will have good picture quality too.
PlayOn runs in the background on your Windows-based PC over your home network. It uses standards called UPnP and DLNA to communicate with networked gaming consoles, TVs, mobile phones and computers working both as an internet browser to access online media and as a UPnP media server to serve videos to UPnP compliant devices.
I am currently using PlayOn with Kodi on three different devices, an OpenELEC based HTPC, Raspberry Pi and a Windows 10 based HTPC. I have been very satisfied with this software and thus recommend it to all My Media Experience readers.
Just keep in mind that PlayOn's transcoding video quality is slightly worse than the original source. It is not too bad, but it is a step down especially with dark areas and shadows.
Step 1: Get the PlayOn Application
You will need to purchase a license to the PlayOn (get it here). When purchasing the PlayOn, I would recommend adding the HD playback capability for just $9.99, so that you can record and watch movies in 720P HD quality.
Step 2: Install and Configure the PlayOn
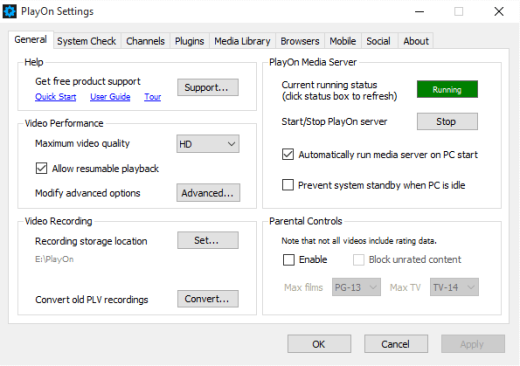
Install the PlayOn to your Windows-based computer.
Go to the "General" tab and make sure to set the "Maximum video quality" to "HD", if you purchased the HD capability. You should also set the recording location, for example to "E:PlayOn".
Go to the "Channels" tab and type your email and password to all the services with which you have a user account, such as Amazon Instant Video and Netflix.
Lastly, you should click the "Apply" or "OK" buttons to save your settings.
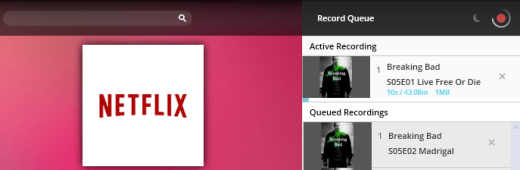
Step 3: Search and Add Recordings to the Queue
You can search and add recordings to the queue either using the PlayOn desktop app for Windows or PlayOn Mobile app that is available for iOS and Android devices.
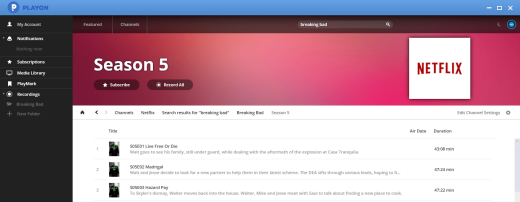
In the main screen of the PlayOn app, you can select the channel to browse or search for movies and TV shows.
For example, click the Netflix icon, select "New Arrivals" and select a movie you wish to record. Once you have started recording the first movie, you can select another one and click the "Add to Queue +" button.
That's it. Now you can proceed with adding the media files to your Kodi media library.
Step 4: Add PlayOn Recordings to Kodi

Next, let's add recorded media files to the Kodi library.
- Go to "Videos" > "Files" > "Add Videos…"
- Browse to the folder location where you stored the PlayOn recordings (e.g. E:PlayOn) and click OK.
- Enter the name for this media source (e.g. PlayOn Recordings).
- Set content type as "Movies" and leave the "Movies are in separate folders that match the movie title" unticked if you use the same folder location where you stored the PlayOn recordings.
- Click OK and you are done.
Now you are ready to start playing your first online recording from the Movies menu.
Stream Online Videos with PlayOn
PlayOn uses UPnP standard to serve videos to UPnP compliant devices such as networked gaming consoles and TVs.
As the Kodi Media Center supports UPnP standard, you can serve media files with PlayOn Media Server even to Linux-based HTPCs or Raspberry Pis.
Tip: You can access Netflix & Hulu from any country with a great DNS redirection tool called UnblockUS. Try UnblockUS for free here.
Option 1: Add PlayOn as an UPnP Source
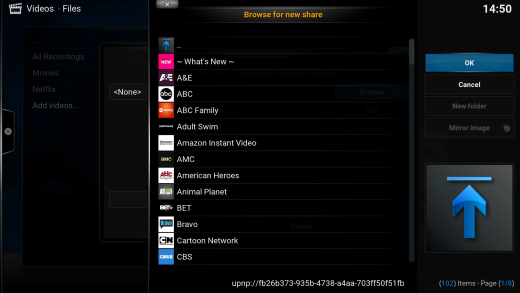
In order to set up the PlayOn UPnP share on the Kodi, go to "Videos" menu in the Kodi.
Select "Files" > "Add Videos…" > "Browse" > "UPnP Devices" > "PlayOn (your computer name)" and click "OK".
For more easy access to your favorite online services, you can add Netflix and Hulu as separate UPnP sources in the Kodi Videos menu.
For example, to add Netflix as a separate source, select "Files" > "Add Videos…" > "Browse" > "UPnP Devices" > "PlayOn (your computer name)" > "Netflix" and click "OK".
Now, you are ready to browse the large collection of premium content and play your first TV show or movie.
Option 2: PlayOn Browser Add-on (Preferred)

As shown in the option 1, you can add PlayOn as a UPnP source, but the PlayOn Browser makes it much easier for you.
The PlayOn Browser categorizes all the media in the PlayOn web interface so that you can browse the content directly with your remote control.
Go to "System > "Add-ons" > "Install from repository" > "Kodi add-on repository" > "Video add-ons" > "Playon Browser" in order to install the add-on.
In order to launch the add-on, go the main menu and select "Videos" > "Video add-ons" > "Playon Browser".
Tip: I would recommend adding PlayOn Browser add-on as a favorite to your Kodi home screen for easy access. For example, in the Confluence skin, go to "System" > "Appearance" > "Skin Settings" > "Add-on Shortcuts" > "Home page Videos submenu". Select the first empty item, e.g "Add-on 1" and select "PlayOn Browser".
Option 3: Integrate PlayOn Streams into Kodi Library (Experimental)
This third option is only for advanced users who wish to seamlessly integrate PlayOn streams into Kodi library.
First, you will need to download the Lunatixz repository for the PseudoLibrary add-on.
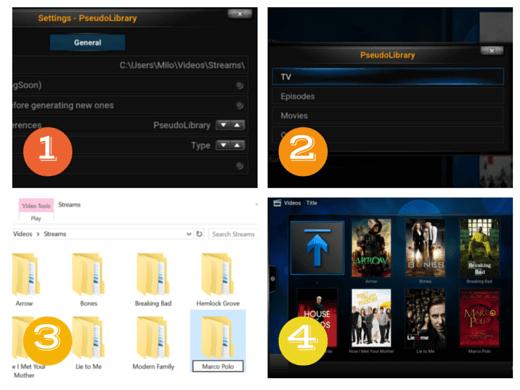
| | Go to "System" > "Add-ons" > "Install from repository" > "Lunatixz Repo" > "Video add-ons" > "PseudoLibrary" > "Install". Then, configure the PseudoLibrary add-on. Set "Strm Folder" where you want to save TV shows and episode folders and stream files. |
| | Go to "Videos" > "Video add-ons" and launch PseudoLibrary add-on. Select "UPnP Servers" > "PlayOn" > " and locate a TV show you want to add. Once you have selected a TV show, e.g "Marco Polo", press "C-key" to open the context menu and select "Create Strms". Then select the media type, e.g "TV". |
| | Once you have added one TV show stream, you will need to rename the folder name from "TV" into e.g "Marco Polo". |
| | Repeat the step 3 for all the TV shows you want to add to the media library. Once you are done, add streams folder as a source by going to "Videos" > "Files" > "Add-videos" > "Browse" > locate stream folder and select "OK". Set content type as "TV shows" and select "OK". |


Note: the stream file links will work as long as you don't reboot your computer. I have not yet found out a way to automatically to keep the UPnP links up-to-date.
Record Streaming Movies in the Cloud
If you don't have a Windows based PC, you can also use PlayOn Cloud (learn more here) that is a streaming video recorder mobile app for iPad and iPhone.
PlayOn Cloud makes it really easy to take recorded shows with you when traveling or watching videos offline for example in an airplane.
| | Download the iOS app from the Apple store. |
| | Sign up free to create your user account and then log in to the PlayOn Cloud. |
| | Select the online streaming service such as Netflix, Hulu or Amazon Video where you want to record a TV show or movie. |
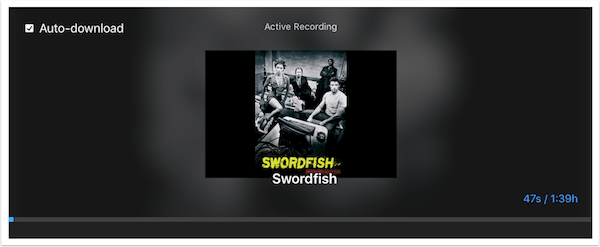
| | Select a TV show or movie and start recording. Once the recording has finished, you can start watching it from the cloud or download it to your device. |
Summary
PlayOn makes it easy to create a personalize media library.
With PlayOn streaming video recorder, you can record and download TV shows and movies from multiple online streaming services and organize all your favorite media in Kodi library.
So, what are you waiting for?
Click to download PlayOn and join the cord cutters
how to add tv shows to kodi library
Source: https://mediaexperience.com/integrate-netflix-and-hulu-into-xbmc/
Posted by: brockteling.blogspot.com
0 Response to "how to add tv shows to kodi library"
Post a Comment